A Step-by-Step Guide to Green Screen Background Editing
Introduction
Green screen technology, or chroma keying, is an essential tool in modern video production, allowing creators to superimpose subjects onto virtually any background. From Hollywood blockbusters to YouTube tutorials, green screens offer limitless possibilities. This guide will walk you through the process of setting up, shooting, and editing green screen footage to create professional-looking videos.
Setting Up Your Green Screen
1. Choosing Your Green Screen Material: You can use a green screen made from fabric, poster board, or even painted walls. The key is to ensure the material is non-reflective and smooth.
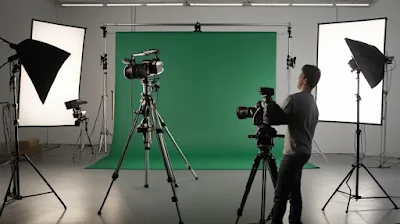
2. Lighting Your Green Screen: Proper lighting is crucial for an effective green screen setup. Use multiple light sources to ensure even lighting across the screen. Avoid shadows, as they can create challenges during the editing process.
3. Positioning Your Subject: Place your subject at a distance from the green screen to avoid shadows and green spill onto the subject. Use a backlight to help separate the subject from the background.
Recording Your Green Screen Footage
1. Camera Setup: Use a high-quality camera to capture your footage. A stable, stationary shot is ideal to avoid inconsistencies in the background replacement process. A tripod can be very helpful here.
2. Recording Tips: Ensure your subject does not wear any green, as this will cause them to blend into the background. Perform a few test shots to check lighting and positioning before recording the final footage.
Editing Your Green Screen Video
1. Choosing the Right Software: There are many software options for green screen editing, including Adobe Premiere Pro, Final Cut Pro, and OBS Studio. Each offers unique features and advantages
2. Importing Your Footage: Begin by importing your green screen footage and background clips into your chosen video editing software.
3. Applying the Chroma Key Effect: Use the chroma key feature to remove the green background. This involves selecting the green color to be removed and adjusting the tolerance to clean up any artifacts.
4. Adding Your Background: Place your desired background behind the subject. This could be a static image, a video, or an animated graphic.
5. Finishing Touches: Adjust the color grading and lighting to ensure the subject blends naturally with the new background. Fine-tune the edges to remove any green spill or halo effect.
Advanced Tips and Tricks
1. Using Spill Suppression: Some editing software includes spill suppression tools to eliminate any green tints that may appear on the edges of your subject.
2. Combining Multiple Effects: Experiment with additional effects such as color correction, shadows, and reflections to enhance the realism of your composite.
3. Utilizing Mobile Apps: For quick projects, mobile apps like CapCut offer simple green screen editing tools that can be used directly from your smartphone.
Conclusion
Green screen editing is a powerful technique that can elevate your video projects by providing creative flexibility. By following these steps and utilizing the right tools, you can produce professional-grade videos that captivate your audience. Practice makes perfect, so experiment with different setups and effects to discover what works best for your projects.


